

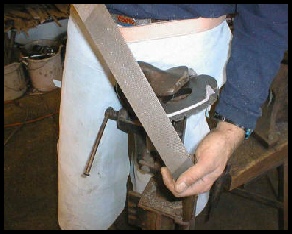
Step #1
Trim the hoof as usual and remove the distortions 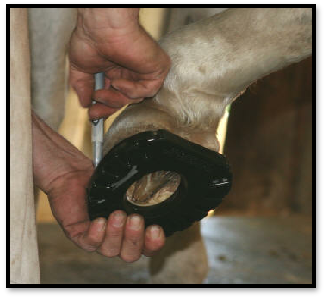 around the perimeter of the hoof.
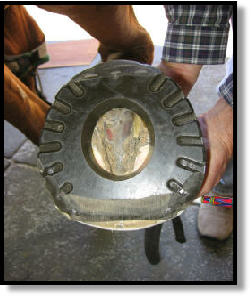
Select a Sneaker that gives the best fit of the side clips. Sometimes a hind pattern fits best and on rounder feet a size larger will give the best clip fit. Align the toe of the hoof with the toe of the shoe. Sometimes it may be necessary to remove some wall with the rasp or notch the wall with nippers for the clips to fit and have the toe positioned correctly. We recommend removing the plastic covering on the clips for the best fit and security of the shoe. Trace the hoof shape on the Sneaker.1
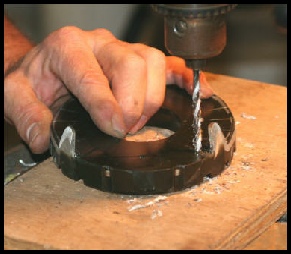
Step #3
Drill the holes with a 5/32" or 11/64" drill bit. Make sure to place the nail holes over the white line for secure nailing. The molded lines on the foot surface of the shoe help to line up with the nailing grooves on the ground surface. However nail holes can be placed anywhere as needed. If you are using a pritchel to make the holes, punch from the ground surface as with a standard shoe. Be sure the pritchel end is sharp and square to make a clean hole.

Step #4
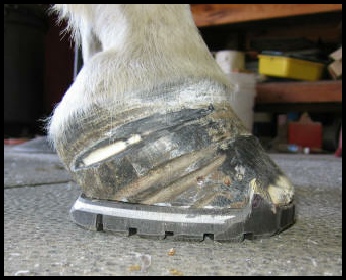
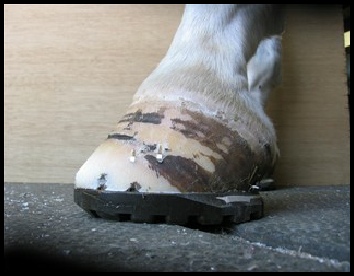
Nail as usual. Any nail style will work but be sure to drive the nail head through the tread into the aluminum base shoe with a punch..
Failure to do this critical step wi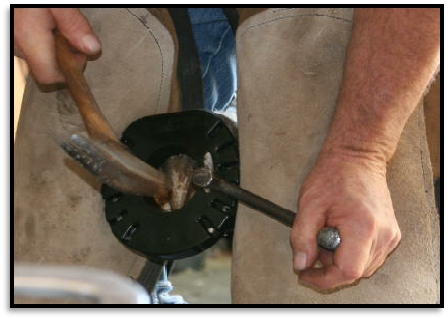 ll result in the shoe becoming loose.
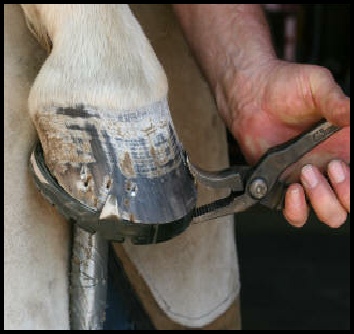
Step #5
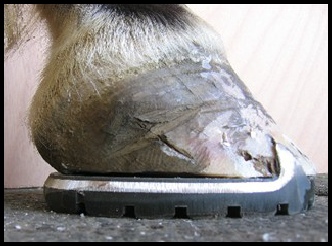
Clip the nail ends, clinch and finish as usual.
Sneakers can be applied with ordinary farrier tools,
but application is greatly facilitated using common power tools.
Helpful Hints:
- Sneakers can be reset multiple times. As long as there is tread to cover the nail heads you can continue to use the shoe.
- Toe studs showing through the tread is normal wear.
- The edges of the shoe break in quickly to the horse's way of going. This rounding of the tread occurs fairly quickly and is beneficial for the horse. If the horse travels unevenly the shoes will reflect that wear pattern.
- Large jawed pull-
offs will make the job of removing the shoes easier. - Do not drill the nail holes too fine, this makes nailing difficult. On flat-
footed horses the holes can be angled inward (pitched) while drilling to get more secure nailing. - If sole pressure needs to be relived, hammer around the center hole on the foot surface to concave the shoe. If further relief is required use an angle grinder to remove some of the sole surface material.
- Corrosion around the nails is unavoidable, a little silicone applied to the hoof surface before nailing will reduce the amount of corrosion.
- Under most circumstances no packing of the center hole is necessary, however the
center hole can be filled to prevent infiltration of debris under the shoe. We recommend
Equi-
pak manufactured by Equithane for this purpose. Silicone may also be used. The plug may be removed at any time without removing the shoe for inspection and cleaning.
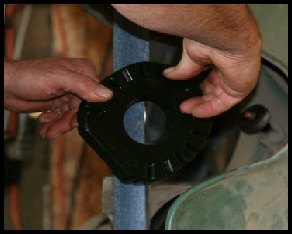
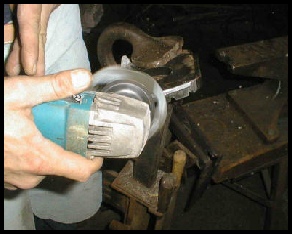
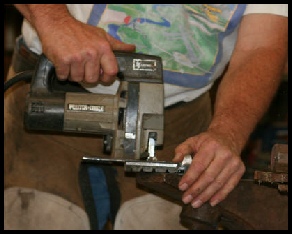
Step #2
Trim the excess shoe.
Use a band saw or a handheld jigsaw to remove larger pieces of the shoe. Round the edges and fine tune the final shape with a flexible grinding disc, belt sander or rasp.
Equithane Adhesive
Materials
Disposable gloves, solvent, tongue depressor or putty knife and a hot air source (optional for cold weather).
Hoof preparation
Trim the hoof as normal paying close attention to removing as much exfoliating sole as possible. Rasp the bottom ½ of the hoof wall to remove all traces of dirt.
Rinse with a suitable solvent such as Acetone, Isopropyl alcohol or Denatured alcohol and let dry.
Sneaker preparation
Step 1: Shape the Sneaker to the hoof as per the application instructions. Leave a small margin of shoe extending around the perimeter of the hoof, about 1/8 “(3mm). Bend the clips so they contact the wall.
Step 2: Roughen the hoof surface of the Sneaker with an angle grinder and rinse with solvent and let dry.
Step 3: Warm the shoe by heating with a hot air gun if the ambient temperature is
below 50° F (10° C). Do not overheat or melt the poly-
Application
Apply a heavy bead of Equithane Adhere (yellow label) to the sole of the hoof, enough to cover the entire surface of the Sneaker. Press the shoe into the glue making sure to keep an even layer over the hoof. Hold the shoe in place till the glue sets, about 2 to 3 minutes. Place the hoof on the floor and apply a rim of glue up the side of the hoof wall about 1 – 1 ½ inches (25 – 35 mm). If the ambient temperature is cool continue to warm the glue to accelerate the cure rate. Rasp smooth after the Equithane has cured
.
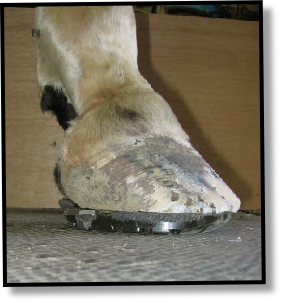
Therapeutic Applications
The Sneaker is versatile and can be applied in the reverse configuration as a squared toe eggbar shoe. Following is an example of reversing the Sneaker for a ring bone case. Note how far back the point of breakover can be moved and how much caudal support becomes available by using the toe of the Sneaker as an eggbar. This reverse configuration can also be applied for other problems such as navicular syndrome and chronic laminitis cases.
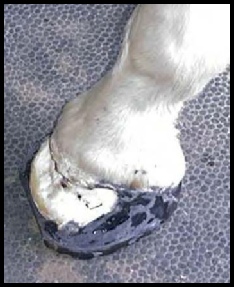
A horse with a chronic side bone and
a clubfoot that has done well
in Sneakers for over 2 years.
An example of a horse with chronic laminitis that has been in Sneakers for over three years with the shoe applied in the reverse configuration.
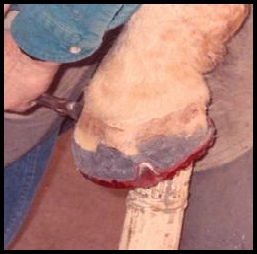
A Quarter crack in the progress of healing and
growing out using the Sneaker's bar shoe support and the concussion reduction properties.
Sneakers helped to heal this crack without added patches or other types of stabilization commonly used to treat this tough problem.
This is an application of the Sneaker on a Charolais cow after an infected coffin joint surgery. The joint was opened for treatment and drainage of the infection.
The infected claw required a shoe to stabilize and correctly position it with relation to the healthy claw while it healed.
The Sneaker provided the necessary stabilization as well as traction on the concrete floors of the hospital. The Sneaker is nailed on and reinforced with Equilox adhesive.
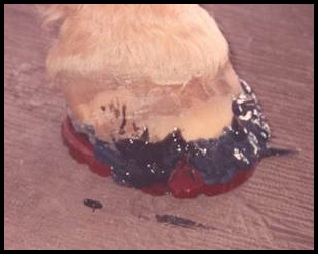
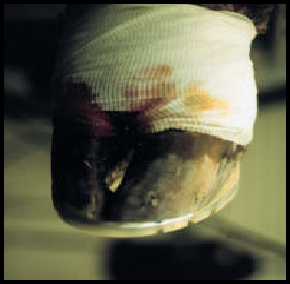
Glue on application for the treatment of 'White Line Disease’
This is the Common name used to describe a fungus infection that digests the middle of the hoof wall. Treatment is difficult because the wall cannot hold a shoe and the coffin bone is often rotated. Resecting the infected wall is the most effective treatment, but this prevents shoes being nailed on in the regular manner.
Sneakers can be glued in place, directly to the sole to protect the foot while the
wall grows out. In this application, the shoe was applied in reverse and the clips
left on to add stability. 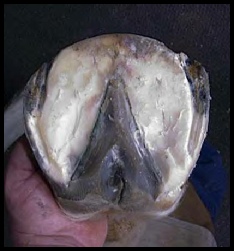
This paint mare belonging to Steve Swain has recovered completely and is now back to work.
|
Minimum Tools Required For |
Recommended power tools are: |
|
Shaping and Punching the Holes: |
Drill with 5/32 or11/64 bits |
|
Vise |
Saber saw or a band saw |
|
Sharp rasp |
Grinder with a flexible disc |
|
Sharp pritchel |
or belt with 24 or 36 |
Click here
for video